


Z31 Front Control Arm Replacement and Bushing Upgrade
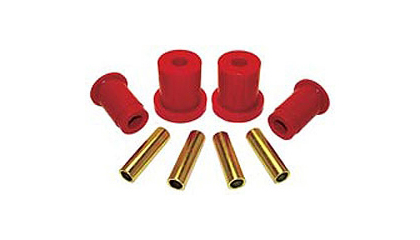
Want to firm up the front suspension and get rid of those rubber bushings? You can easily upgrade to polyurethane bushings, which are available through many aftermarket suppliers.
There are other changes you can do while working with front control arms, as there were two versions of the front control arms. The 1987-1989 300ZX models came from the factory with longer front control arms, adding an extra 10mm for a wider track width. You can use this extra width on earlier models (1984-1986) to add about -5 degrees of negative camber to the wheels, helping with turn-in grip.
You can also achieve the same by swapping the early strut housing for the later 87-89 models and gain camber this way—without the expense of camber plates. Below is a picture of the early (top) control arm versus the late (bottom) control arm:
Parts Needed
It is reccomeneded to replace all your suspension bushings for the best results. You can do so using the total kit below, Or if you want to replace just the control arm bushings the part numbers are listed below:Tools Needed
- 13mm Wrench
- 14mm Wrench
- 17mm Wrench
- 19mm Wrench
- 12mm Socket
- 13mm Socket
- 14mm Socket
- 15mm Socket
- 17mm Socket
- 22mm Socket
- Ratchet
- Prybar
- Press or Vice
- Dead Blow Hammer
- Jack and Jackstands
- Torch
Control Arm Removal
-
Start by jacking the front of the car up using the lifting points and then securing it with jack stands. Remove the front wheels and then the calipers, wiring them up out of the way. Be careful not to damage the hoses. -
Begin removing the control arms. First, remove the sway-bar end-link from the arm (14mm nut and bolt). -
Remove the cotter pin and loosen the 19mm crown nut on the tie rod end. Once loosened, give it a good crack with a dead blow hammer to knock it from the steering knuckle. Once loose, remove the crown nut and the tie rod from the knuckle.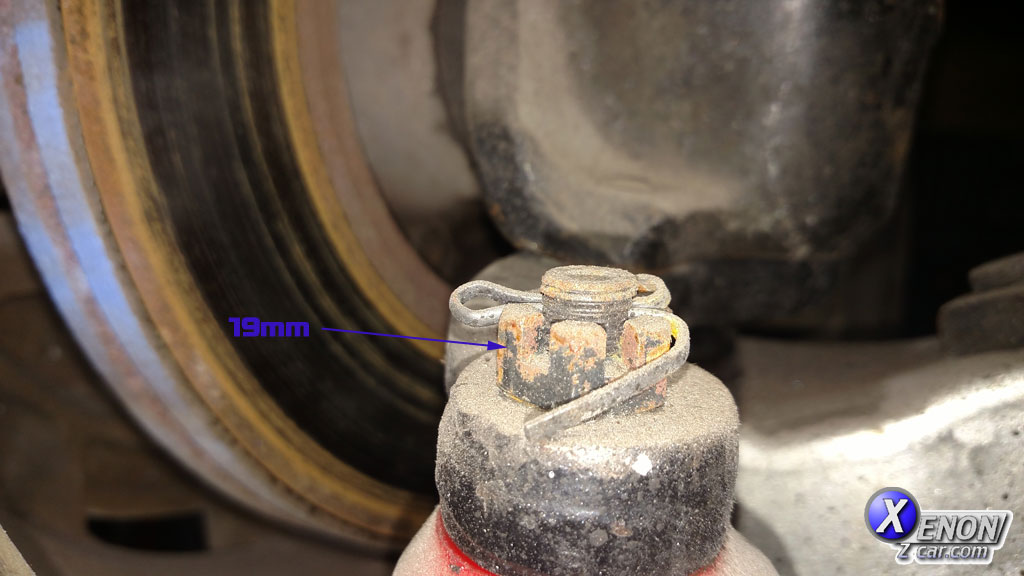
-
Next, remove the tension rod nuts on the bottom of the arm (17mm). 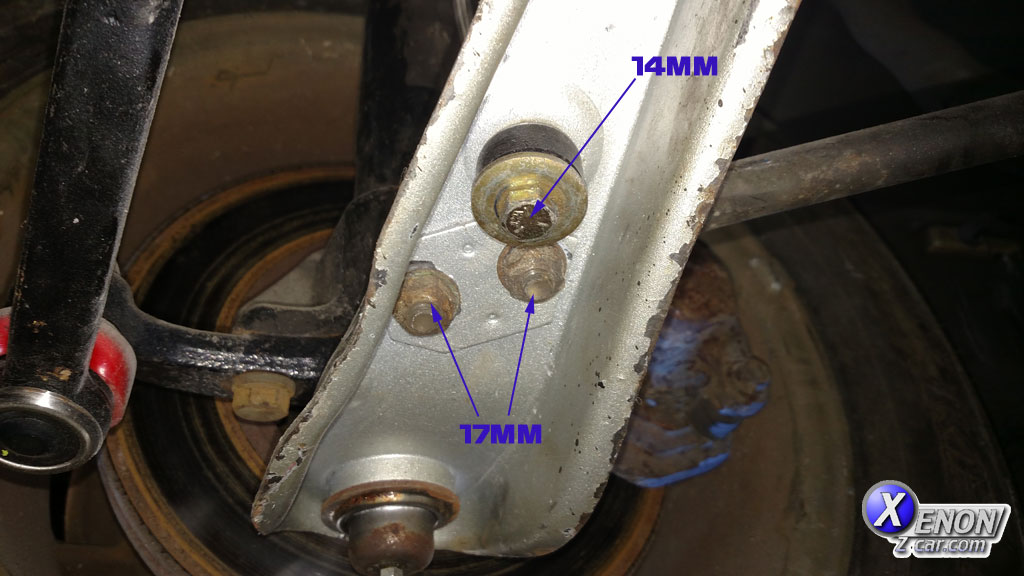
-
Remove the two 17mm bolts on the bottom of the strut that attach the strut to the steering knuckle. You will then need to remove the knuckle from the bottom of the strut by hitting it with a hammer sharply. It will pop free. PB blaster or another type of penetrating oil will help with this. 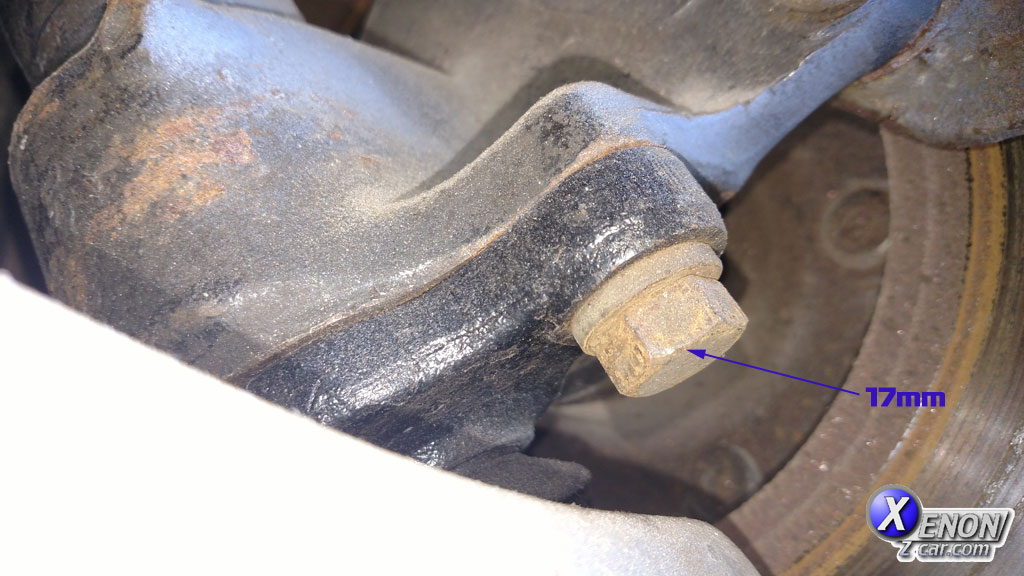
-
Finally, remove the 22mm bolt holding the arm to the crossmember. Once this bolt is out, the control arm will be free to come out completely.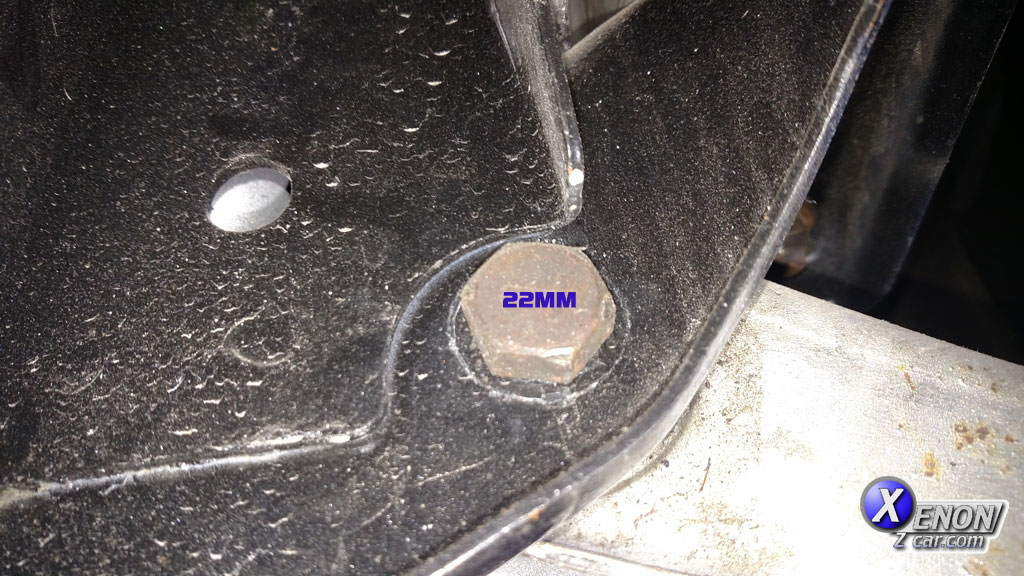
Bushing Removal and Replacement
- With the control arms out of the car, it’s time to remove the bushings. The best way is to use a torch to burn the rubber out of the control arm, which will leave the outer sleeve needed for the new bushings.
- Once the rubber is burned out, clean up the outer sleeve. A Dremel with a flap wheel works quickly, but you can also use sandpaper and a scotch brite pad.
- Using the supplied grease, lubricate the sleeve in the control arm and press in the new bushings.
Reassemble
Reassemble the front suspension the same as it came apart using the Torque specs listed below.Torque Specs (Ft-lb)
| Component | Torque Spec (Ft-lb) |
|---|---|
| Control arm to cross member bolt | 69 – 83 |
| Tension rod nuts | 65 – 80 |
| Steering knuckle to strut housing | 53 – 72 |
| Sway bar end link | 12 – 16 |
| Caliper slide pins | 16 – 23 |
| Caliper bracket | 53 – 72 |
Sources Used
- Written by: XenonZcar
- Torque Specs from: 1984-1988 Nissan 300ZX Factory Service Manual