
XenonZcar.com - Z31 Strut Replacement and Front Suspension Overhaul
Even with 140k miles on the odometer, my 300zx seemed to handle really well. At interstate speeds, however, it would tend to track back and forth and would wallow a bit over bumps. As with every other component on the car, the suspension received a complete overhaul.
To begin, completely disassemble the front suspension on one side. If you have the engine out of the vehicle, you can completely disassemble the front suspension.
Removal Of the Strut
WARNING: The strut assembly is capable of storing large amounts of kinetic energy and can cause serious injury if handled improperly. If you are not comfortable with the tools or the procedure, then do not attempt to disassemble the strut.
Tools Needed
- 19mm socket
- 17mm socket
- 12mm socket
- Pry bar
- Floor jack
- Jack stands
- 2 large Pipe wrenches
- Spring Compressor
- Rubber Mallet
- PB blaster or other penetrating Oil
Parts Needed
|
Part
|
Part Number
|
|
Tokico Illumina Strut Cartridges (requires Adj Strut tube)
|
Part # BZ4005
|
|
Tokico HP SERIES NON - ADJUSTABLE
(requires non Adj Strut tube)
|
Part # HZ3100
|
|
KYB GR-2 (requires non Adj Strut tube)
|
Part # 365056
|
|
KONI Sport (Yellow) (requires non Adj Strut tube)
|
Part # 8641 1060Sport
|
|
KYB adapter kit (Used to install struts made for non adjustable tubes into adjustable tubes) NLA from KYB
|
KYB Part # KIT108A
|
Removing the MacPherson Strut Assembly
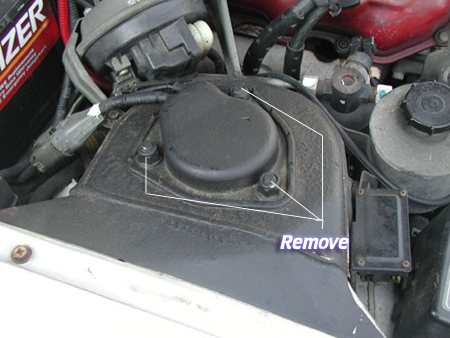
- On turbo cars with the adjustable suspension, remove the 3 outer bolts that attach the top of the strut to the car. This is so you can access the center nut on the strut.
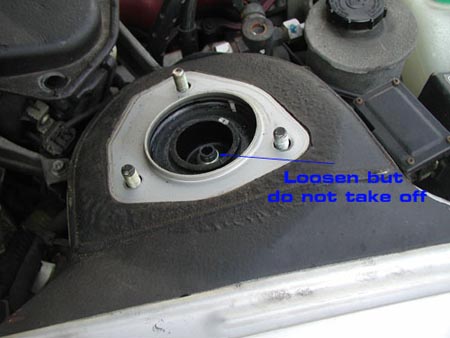
- Loosen the center nut but do not remove.
- Lift the front end of the car up and remove the wheels.
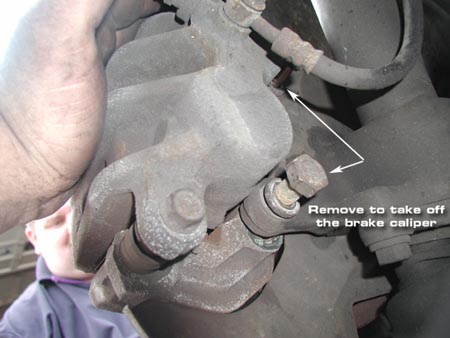
- Remove the brake calipers and disconnect the brake line from the strut. Do NOT hang the brake caliper by the hose; use a wire to hang it.
- Remove the 2 bolts that attach the strut to the steering knuckle.
- Have your assistant take an appropriately sized pry bar and pry the suspension down a few inches, then lift the strut unit out. Some times the strut is stuck to the steering knuckle, you can tap it with a rubber mallet to free it up. I had to do this to both of my struts as they were froze solid to the knuckle
Strut Disassembly
With the front suspension removed from the vehicle, disassemble the strut assembly. This will require the use of a spring compressor; be careful with this tool as the spring has a substantial amount of stored energy. Lay the components out as you remove them to ensure that they are installed with the appropriate orientation. Degrease all components; remove the wheel bearings and thoroughly clean them; do the same for the strut bearing. To disassemble the Strut do the following: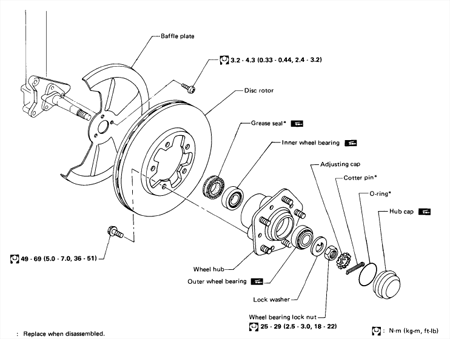
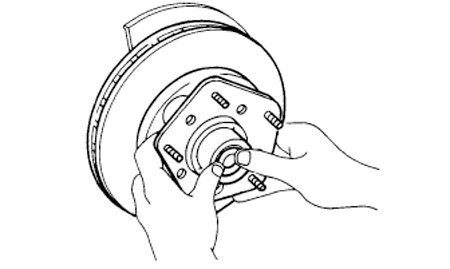
- Remove the Hub by removing the dust cap and cotter pin, and then loosen the Hub lock nut.
- Once this is removed you can pull the hub and rotor assembly from the strut. (Be careful not to drop the outer bearing)
- Now you can remove the splash Shield by removing the three (3) bolts.
- Next mount the Strut into a Vice and using spring compressors, Remove the tension from the spring.
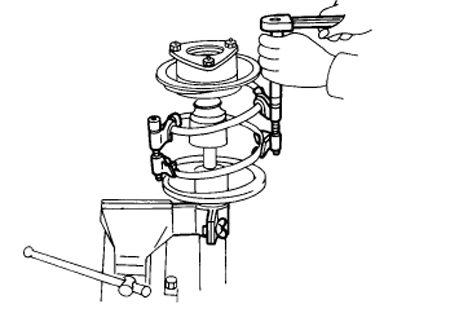
- With the spring compressed, finish removing the center strut nut on the top of the strut and remove the strut bearing and spring.
- Once the spring is removed you will have access to the strut Gland Nut. Using two large pipe wrenches loosen the gland nut from the strut. (Be careful as fluid will pour out of the strut).
- With glad nut off, remove the O-ring seal and drain the fluid. The strut cartridge will simply come out now.
Strut Assembly Reconditioning
- Once clean, give each component that will be reused, a fresh coat of paint.
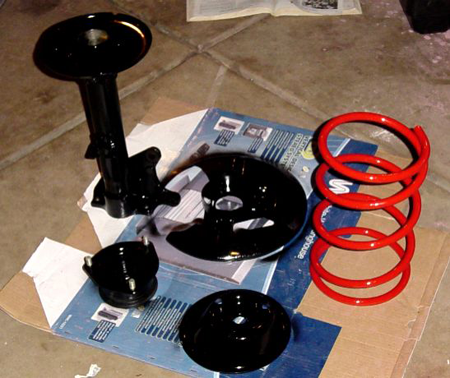
- Since my springs, strut bearing and upper mounts are in good condition, I chose to reuse them. Eventually, however, the springs will be replaced with lowering springs.
- Once you know what you need, order replacement components. I chose to use Tokico's adjustable Illumina strut Cartridge part #BZ4005. They are five way adjustable and will give a smooth ride on the lower settings and a rock hard ride with them on the high setting.
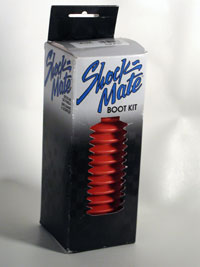
- I also only needed to order new dust boots to install as my strut bearings and upper mounts were still in good condition.
- (Note: The adjustable suspension strut tube is larger in diameter 35mm vs 32mm than the non-adjustable tube. To install Tokico adjustable Illumina struts into a non-adjustable suspension model you will need to swap out the strut tubes Part #’s (54302-11P25 AND 54302-11P26))
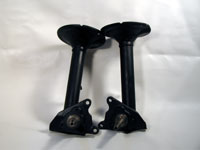
Ball Joint and Tie-Rod Ends
Replacement ball-joints and tie-rod ends are readily available and inexpensive. When you have the suspension apart, these items should be replaced as a matter of recourse. New ball joints are not available from Nissan; you have to purchase the control-arm as an assembly. Fortunately, you can purchase excellent quality ball-joints from after market suppliers and press them in. I chose to use Dana components. The old ball-joint will need to be pressed out of the suspension arm and the new one pressed in. With both ball-joints and tie-rod ends, be careful to not tear the boots when installing them.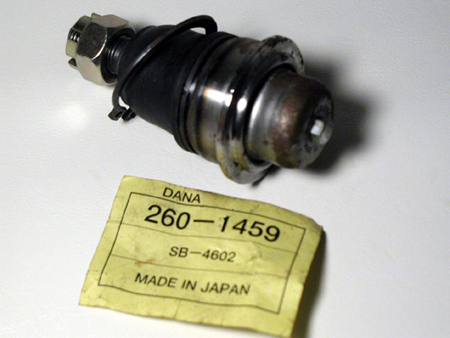
While you have the suspension apart you can also upgrade the control arm bushings. Click here for the write-up
When I removed my old tie-rods, it was evident they were in poor condition.
Front hubs and Wheel Bearings
While apart, replace the hub wheel seal and repack the bearings. Wheel seals are very inexpensive; I used Beck Arnley seals and didn't pay more than $8.00 for both front seals. If your bearings are in poor condition, you must also replace the bearing races. If this is necessary, drive them out, carefully, with a drift punch and tap new races in. Also, be sure to use a good quality, high-temp, disc-brake wheel grease. I use a synthetic Valvoline grease (red) that works well. Additionally, make sure to properly pre-load the bearings (tighten to specified torque and back off nut 1/4 turn) and install a new dust cap. Help brand replacement products (available at most auto part stores) sells a cap that fits well (though, tightly); take your old cap in and match it up.
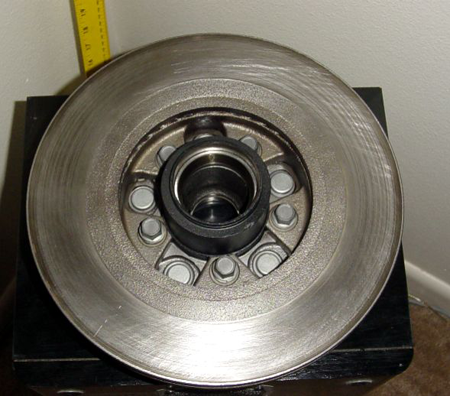
1984-1986 style front hub
Final reassembly
Finally, reassemble as reverse of disassembly; make sure to torque all components to spec and fill grease-fittings with a high-quality grease. Test the steering for binding and then take the car to an alignment shop.
While you have the suspension apart you can also upgrade the control arm bushings.
Sources used on this page:
- Writen by: Redare & XenonXIII
- 1984-1988 Nissan Factory Service Manual