
Z31 Repairing the Timer Control Unit(TCU)
The Timer Control Unit controls the following functions
- Intermittent Wiper control Timer
- Interior Lamp Timer
- Door Key Hole Illumination Timer
- Illumination Control Timer
- Light Warning Timer
- Key Warning Timer
- Seatbelt Warning Timer
- Rear Defogger Timer
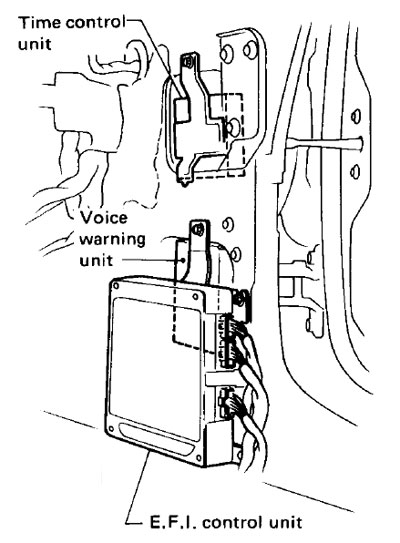
Where is it Located
The TCU is located on the right side Kick pannel Above the ECM (See Diagram Below).
Removal of the TCU
The procedure in your FSM that shows the two easy steps:
- Remove R.H. dash side cover and remove blower motor.
- Remove time control unit with harness connected.
Easy right? But wait, cant find the TCU? You followed the two steps, right? If only it were that easy.
Here is how you actually get it out.
Tools Needed
- Phillips head screwdriver
Process
- Remove the glove box.
- Remove the lower passenger trim panel.
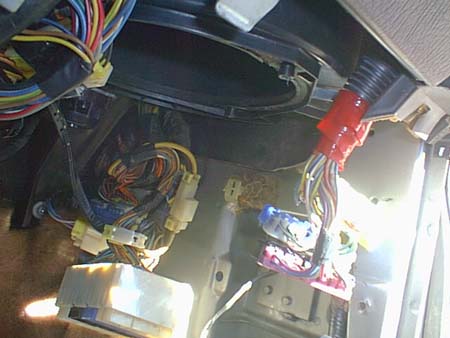
- Disconnect the wiring harness on the right side (the one with the 4 large plugs in it.) Unscrew it from the firewall.
- You can now see the bottom corner of the TCU (just barely) if you lift up the rubber pad -
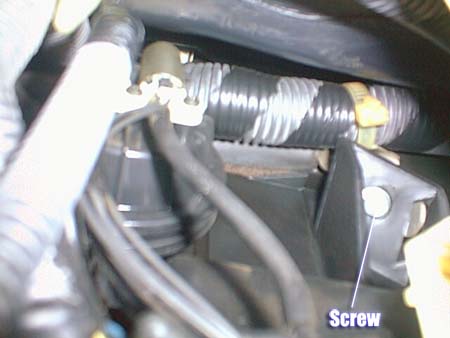
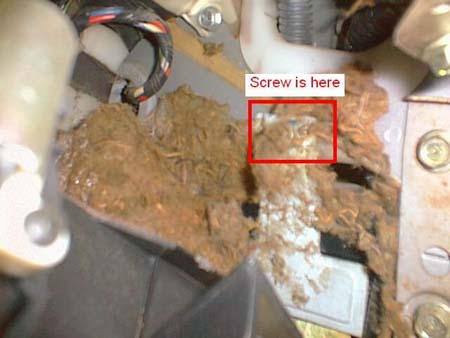
- Here comes the fun part. You have to remove the ENTIRE fan assembly to get to the TCU. This means not only removing the motor, but EVERYTHING above it. There are two screws holding it on attached to the firewall (where the passengers feet would be) and a third above the glove box. This is a bad picture looking straight up from where the glove box was - you will see the screw.
- Disconnect any electrical connector that gets in the way. You may also want to disconnect the vacuum line (auto AC).
- Lift up on the blower unit, and push back about a 1/2". This unhooks it from the top.
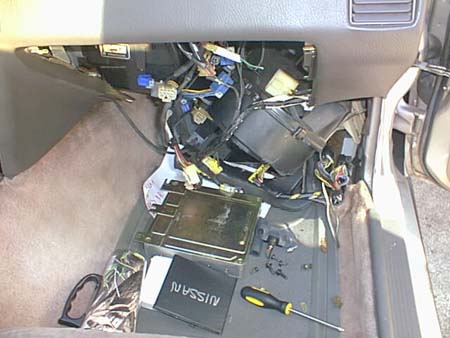
- Wiggle and curse it down until your passenger floorboard looks like this. You don't have to completely remove it from the car, but get it low enough to get to the TCU.
- NOW, you can get to the TCU to remove it. There is only one screw holding it on, and the wiring harness.
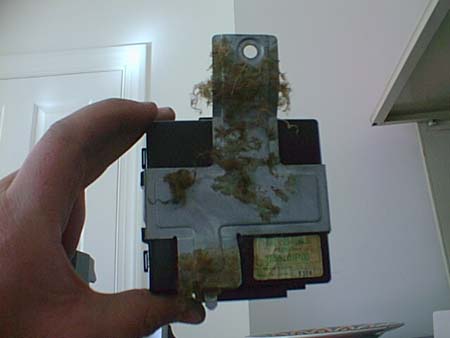
- Now that its out, curse the engineers a bit. Here is a picture of the TCU:
- Put in your new (old) one, and reverse the steps. Might want to check and make sure the replacement works, first. And make sure you disconnect the Autometer gauges or radio you hooked up that caused it to blow in the first place, or you will do this again.

Repairing The TCU
If you are good with electronics - here is what is actually wrong with the TCU. Crack it open, and look at the transistors.
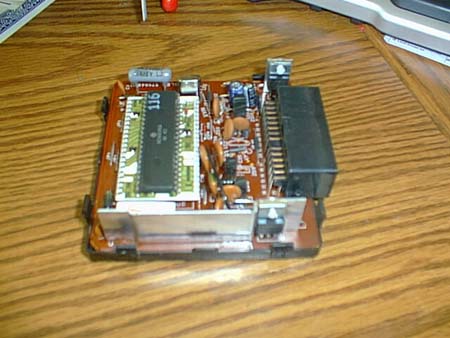
The one riveted to the aluminum heatsink is the problem - chances are it is cracked/obviously bad.
Unsolder it. Part# on mine was a NEC C2654. Replace it with any 8A or greater NPN TO220 will do (hfe>10). The spec sheet on the NEC rates it at 15amp, so I would recommend that. Someone I know used a 10A NPN Darlington, and it worked just fine.