Z31 Surface and Perforated Rust Repair
If you've found surface rust, typically, you'll also find perforated rust; just start looking. These are some of the places I've found both surface and perforated rust on my 84 Turbo; I would check out all of these places and fix any problems, now, before they become big problems.
Where to look for rust
- On the rear quarter panels, both in front of and behind both wheel wells, where the wheel well meets the body. 20 years of dust has settled into the rear quarters and held water (typically from leaky tail lights or quarter windows). If you don't find rust here, remove the interior trim panels and Shop-Vac out all of the dust and dirt. Also, remove the jute Nissan used for sound deadening; it wicks water into the settled dust like a sponge.
- Rear quarter panel rust, behind wheel.
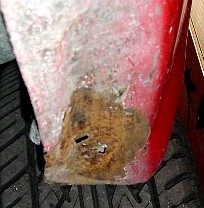
- Rear quarter panel rust, in front of wheel.
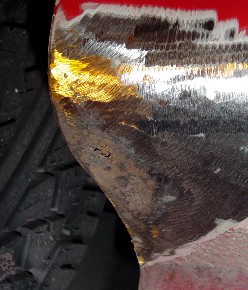
- Below the rear bumper cover, just behind the rear wheels. The tires kick up mud, which sits in this area and holds water. Rust will eventually form here.
- At the bottom of both front fenders, where the fender meets the door sill. There is a ledge designed into the uni-body structure at this point which holds debris from the cowl; moisture soaks into this area and causes the fenders to rust out
- Also, check door sills for rust; the ground effects used on all 300ZX's helps trap dirt here, which holds moisture.
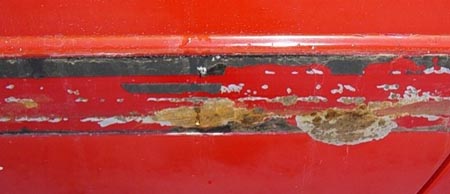
- Beneath the side molding (84 to 85 models); again, dirt can build up here and trap water. I found a tremendous amount of surface rust on my 84 under the drivers' side molding.
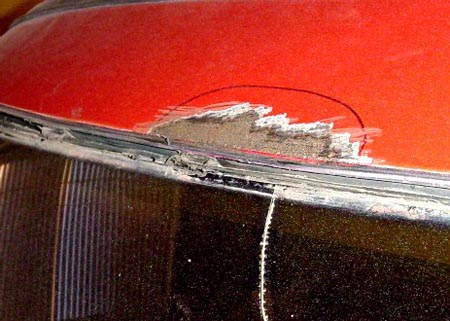
- Around the windshield frame. A replacement windshield was installed in my 300ZX several years ago; a shoddy job with the sealant allowed water to leak past, causing the leading edge of the roof to rust.
- Beneath the tool kit; the tool kit is made of a spongy like material, leaky tail lights and quarter windows allow moisture to wick into the tool kit and causes the area to rust out from the inside out.
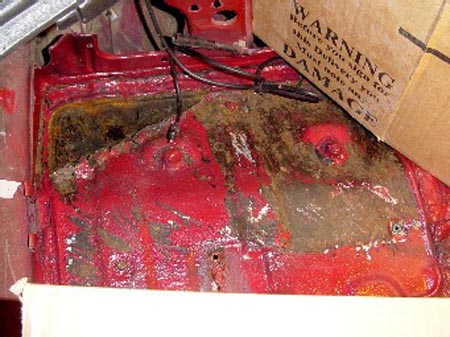
- The spare tire well; my car didn't have any rust here, but I know it's a common place for rusting to occur. As with the tool kit and rear quarters, leaky tail lights and quarter windows allow moisture to pool in the spare tire well, leading to rust and eventually, perforation.
- Under the rear hatch rubber weatherstripping. This is a simple check; pull up your hatch weatherstripping and check for rust. Typically, rust will form on the lip that holds the stripping. If you find rust, repair it sooner rather than later.
- Lastly, the floorboards. Inspect the metal plates that line both floorboards. Any signs of corrosion means there is a lot unseen. A good way to check this area is to remove the rear subframe front mounting brackets. If you find rust underneath them, look further. Corrosion here is often caused by leaky t-tops.
Removing surface rust
I used a 4 1/2" angle grinder that I found at Harbor Freight. I know what people say about Harbor Freight tools, however, the angle grinder cost me $17.99 and I've used it almost continuously over the past year; this includes several drops, kicks, etc., and it's held up well. A 4 1/2" 36 grit disc was used to remove the paint and visual surface rust from several points on the body; be very careful, however, not to over-heat the area and cause the panel to warp or dig holes in the metal. If you find that the rust has perforated, you will need to cut it out; I'll talk about that in a moment.
Once the rust and paint have been removed from the area, I use a pneumatic orbital sander with 80 grit paper to smooth things back out. This makes a suitable surface for adhesion of primer surfaces. The area should be sanded until smooth to the touch (i.e. no discernable edges or ridges can be felt with your finger tips). When the area is free from edges, prime the area with an etching primer; you can use an auto-parts store type product such as DupliColor's Automotive Etching primer, however, if you are planning on painting the area with a professional paint, I would recommend visiting an automotive paint store and picking up a can of professional etching primer. Allow the primer to cure for 30 to 60 minutes (depends on humidity and temperature). Once cured, apply a coat of high-build filler primer. As with the etching primer, you can use a product such as DupliColor's Sandable Filler Primer if you plan on repainting the area with DupliColor's products; for professional paints, I have had very good success using Evercoat's Uro-Fill surfacer. This will fill in any remaining grind marks and help rebuild the surface. Allow the filler primer to cure for at least 120 minutes; using 320 grit wet-or-dry sandpaper, carefully blend the filler primer into the existing paint. Continue the cycle of applying filler primer and sanding, until you cannot discern, with your eyes closed, rubbing the surface, where the grinding took place. Apply a final coat of filler primer and blend using 400 grit wet-or-dry. Mist the surface with water and site along the contour of the panel. You should not be able to see, in the reflections, where the repair was made. When satisfied with the surface, apply a coat of final surfacer and blend into existing paint with 600 grit wet-or-dry sandpaper.
Repairing Perforated Rust
As with surface rust, carefully grind the surface until all paint and rust is removed; with perforated rust, you will have some holes in the surface. Now comes the tricky part; determine how much of the surface is affected by rust. Using a cutting wheel (or tin snips), remove the entire affected area. Save the piece that you removed, as you will need to use it as a template. As an example, take the passenger side rear quarter from my 84.
The area outlined in blue is what was removed; rust is like malignant cancer, if you don't remove it all, it'll just keep coming back
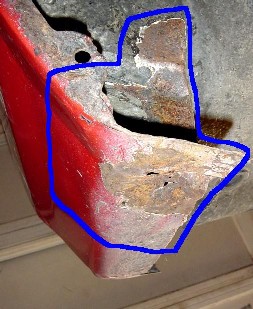
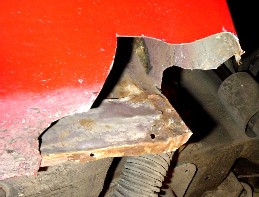
I purchased a 24" X 24" sheet of 22 gauge mild-steel from my local Ace hardware store. Using the removed piece as a template, I cut a patch, approximately 1/2" larger (on all sides). Now, the second tricky part of this repair; again, using the removed section as a template, carefully shape the patch to match, exactly, the original contours of the removed piece. I use a 20 lb anvil that I purchased from Harbor Freight and a body-hammer set to help get the shape where I want it. Measure the patch; continue to shape, until it fits exactly.
Once you have the patch shaped as the original, carefully place the patch in behind the opening. Using a pair of vise-grips or a welding magnet, clamp the repair in place.
I use a Lincoln Weld-Pack 100 Welder that I purchased from the local Home Depot. It uses a 0.039" flux-core wire and works very well for body work; additionally, it is very simple to become efficient with and works on 115 Volt supply, so you don't have to rewire your garage. To be able to weld such thin stock takes practice; I initially began by practicing on scrap 22 gauge mild steel; after several tries, I came up with a "tack-weld" approach to seam the pieces of metal together. Using the lowest setting and a feed rate of 9, I initially hold the patch in place using several evenly spaced tack-welds. Once in place, I remove the clamp and brush the entire area; once clean, I place a series of adjacent tack welds, the second one immediately next to the first, and so on. This allows the heat to dissipate and prevents both burn through and warpage of the surface.
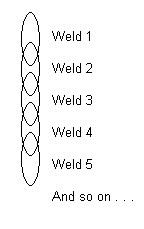
The "tack- welds" are overlapped (as demonstrated), making a continuous seam when done
After welding, coat the back side of the welds with seam sealer. I have been using 3M's brushable grey seam sealer as it provides very good brushability, adherence and waterproofing. You should be able to find this at most auto body shops. Additionally, I coated the insides of the quarter panels and underside of the vehicle with rubberized undercoat to act as a weatherproofer and sound deadener.
For my passenger side rear quarter, I had to rebuild the area in three steps. First, the inner skin, second, the structural support, and finally, the outer skin.
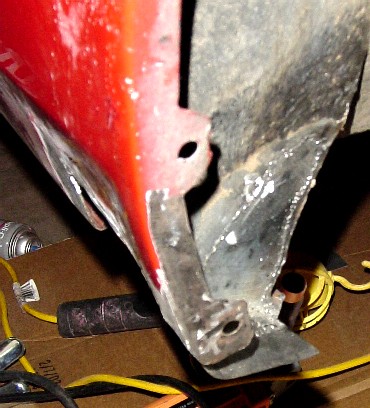
Stage 1, repair of the inner skin.
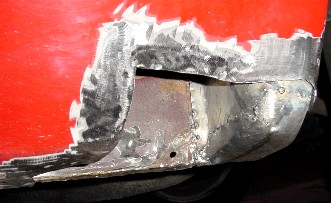
Stage 2, repair of the structural support
Once the patch is seamed in place, grind the area using the 36 grit angle grinder, until there are no high spots. To insure that the patch is shaped perfectly, once welded in place, use a body hammer set and gently restore the original contours of the metal. I shaped this patch before hand, but the shape wasn't entirely correct; a hammer and dolly were used to restore the wheel well bulge contour.
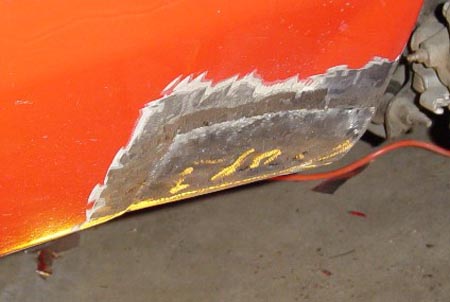
When satisfied with the patch, spray the entire area with etching primer and let it cure for 30 to 60 minutes. Mix an appropriate amount of plastic filler (I typically mix up a golf ball sized daub) and carefully apply over the patch. Allow the filler to cure for at least 60 minutes. Using 220 grit wet-or-dry sandpaper wrapped around a short piece of 2X4, carefully sand the area until smooth with the original surface. Continue applying filler until you cannot discern where the patch is (with your eyes closed, running your hand along the area).
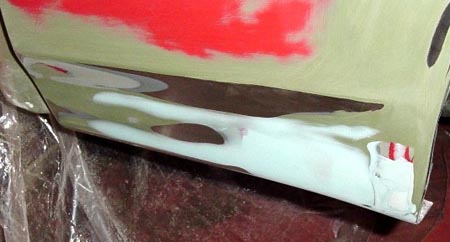
This is what the surface looks like when filled and sanded with 300 grit wet-or-dry. Despite the rough appearance, the surface is very much smooth and perfectly contoured.
When the area is perfect (or as perfect as you choose to make it), apply a coat of high-build filler primer to the entire area; let the primer cure at least 120 minutes. Blend the area into the existing paint using 320 grit wet-or-dry sandpaper. Apply a second coat of filler primer. Blend the area again, this time using 400 grit wet-or-dry sandpaper. Apply a final coat of primer-sealer to the area and sand using 600 grit wet-or-dry paper.
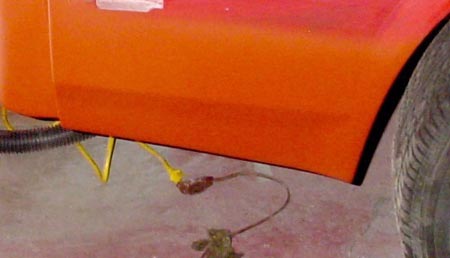
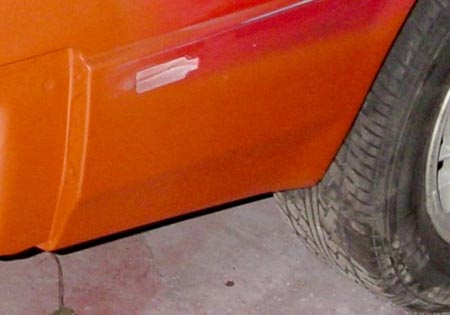
Special Considerations
Windshield Frame Rust RepairAs mentioned above, I found some bubbling rust in the windshield frame, near the passenger side t-top. Before any rust repair can be done, the windshield must be removed. I purchased a windshield removal tool from a man on EBay for less than $12 shipped. Worth every penny. Insert the knife into the sealant and pull the cable; that's about the gist of it. You will undoubtedly break the windshield when removing it as the tool exhibits force on the windshield. If you insist on trying to remove the windshield without damage, have someone push down on the tool and keep it perpendicular to the windshield while you pull the cable.
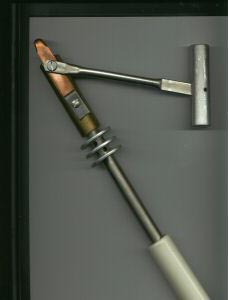
Once the windshield is removed, its time to scope the rust. This is the corrosion I found in my car. Before you begin rust repair, be sure to mask the windshield opening very well, to protect your interior and dash.
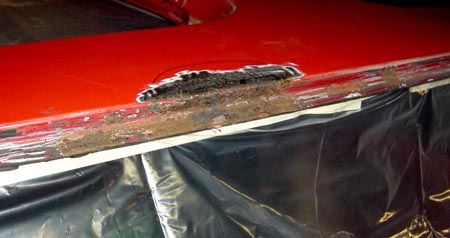
At first glance, this looks nasty. I ground the surface with my 4 1/2" angle grinder using a 36 grit wheel. Once clean, I found three areas where the rust had perforated. These areas were trimmed out to good metal and patches were fashioned and welded in. The welds were flattened using the grinder.
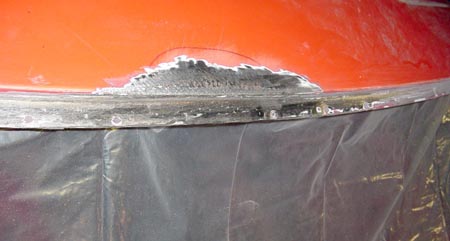
Once ground, the windshield frame looked like this.
Finally, I applied a thin coat of filler over the upper surface, to fill the pit marks made by the grinding, and finished the surface as described above.
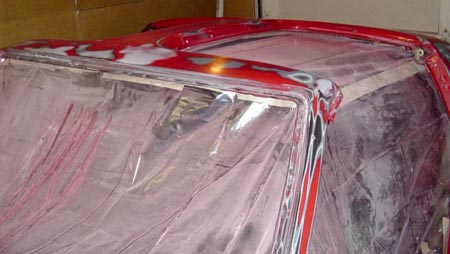
Floorboard Rust Repair
The metal plate that screws to the floorboard, on my passenger side, was showing some signs of corrosion. To remove it, I removed the screws and pried the plate up using a claw hammer.
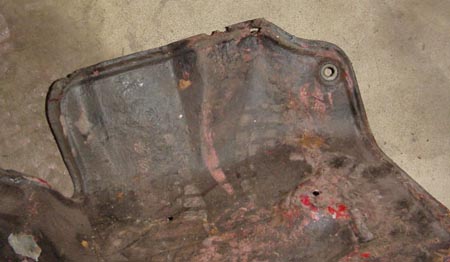
Top of plate
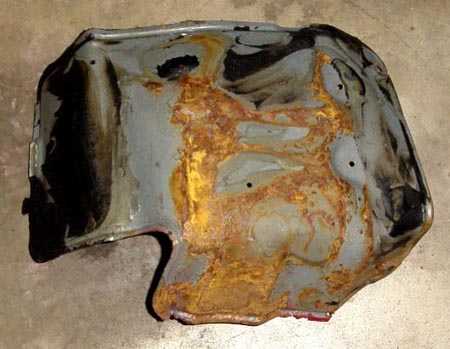
Bottom of plate
Under the plate, Nissan buried a large body hole, but didn't use a plug. I guess, with the amount of black goo they used, they didn't need one.
On first glance, the corrosion appears to be merely surface rust. I pryed the seam upward, using a screwdriver, and found that the metal had completely perforated near the subframe mount. I would assume that the rust occurred due to leaky t-tops on the passenger side.
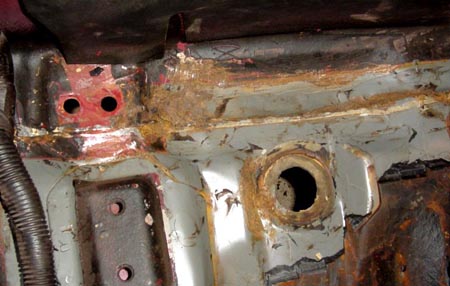
Inside passenger side
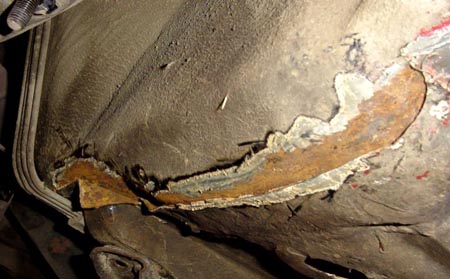
Underside
To correct this, I removed the affected area using my angle grinder, with a 36-grit cutoff wheel.
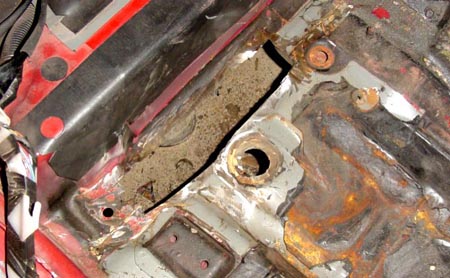
The patch was shaped using the body hammer, pictured. I used a large vise, with the jaws under each line, to shape the patch.
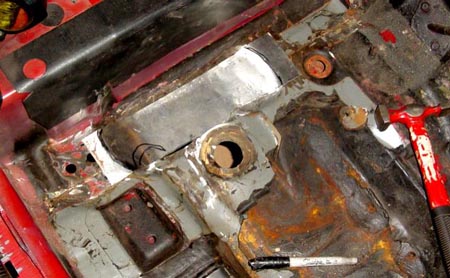
Once happy with the patch contour, I then welded it in. The undercoating stinks to high-heaven when it burns; smokes like crazy too. Be careful when doing the passenger side; the fuel lines run just on the other side of the frame rail. Don't cut them or accidentally weld them.
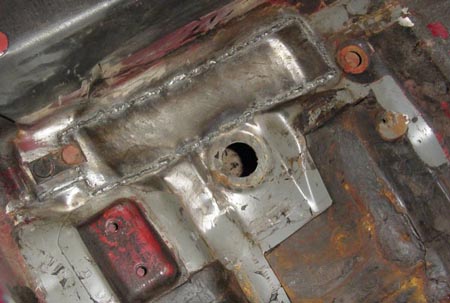
To finish the repair, I will prime it using zinc primer and then brush on 3M's brushable seam sealer, over all welds and seams in the area. The underside will receive similar treatment with several coats of undercoating.
