
Z31 Rebuilding Hydraulic Lifters
If you're reading this page, undoubtedly, your lifters are tapping away at startup. Inside the hydraulic lifter used on the 300ZX, there is a small check valve which keeps oil in the lifter, comprised of a ball bearing and a spring. As miles are accrued on the engine, a buildup of sludge within the lifter prevents the check valve from working, sticking it open. When open, the oil within the lifter drains out, preventing hydraulic pressure from building up and causing the lifter to knock.
Fortunately, you don't need to buy new lifters. Typically, they can be disassembled, cleaned and filled with new oil, making them good as new. I have rebuilt several of these type lifters and can do 6 in about an hour.
Items Needed
- 3" or similar sized C-clamp
- 2 mm or similar sized Allen wrench (or similarly sized steel wire, such as a paperclip)
- Toothpicks or dental pick
- Heavy duty straight 30W engine oil (I've recently begun using synthetic 50W engine oil, your call)
- Paper towels
- Good engine degreaser (Castrol's Super Degreaser (Purple))
- Lacquer thinner
Procedure
- First, remove the lifters from the engine. This is the most tricky part, but not difficult.
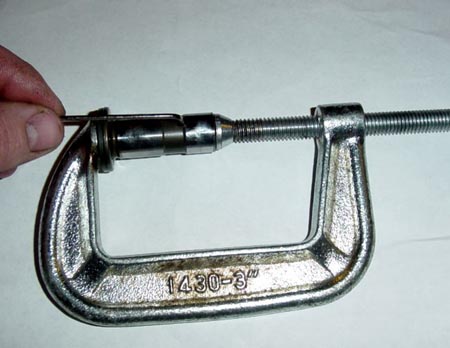
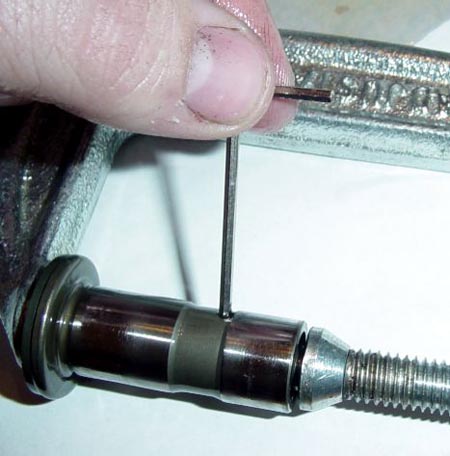
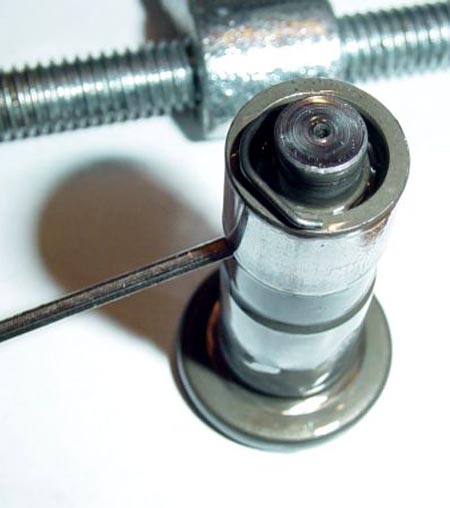
- With the lifter laying on a clean surface (I use computer paper), use a large c-clamp to compress the piston into the lifter body. Insert a 2-mm Allen wrench into the hole in the lifter; if the hole doesn't line up, loosen the clamp slightly and rotate the lifter body until it does, then insert the Allen wrench.
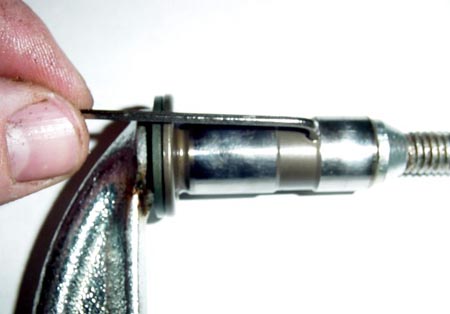
- With the Allen wrench installed, release the c-clamp and remove the lifter. Using a dental pick (or toothpick), pry out the c-clip, from the top of the lifter. Be careful, these things have a surprising amount of energy in them and can fly across the room.
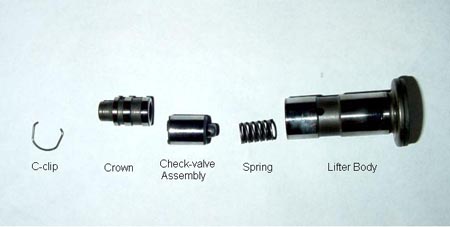
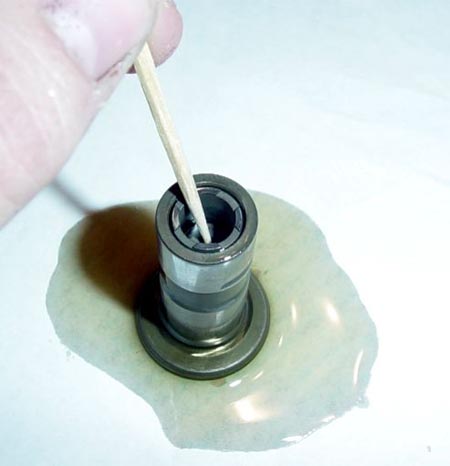
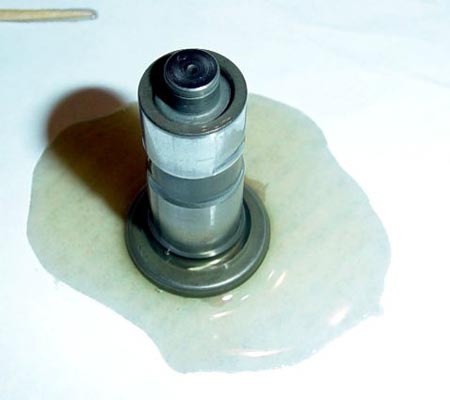
- Once the c-clip is removed, disassemble the lifter. The crown should pull right out. The check valve assembly is a bit more difficult. Insert a toothpick into the center of the check-valve assembly and push the ball bearing down. At the same time, lever up on the toothpick to pull the assembly out. Finally, remove the spring. Your lifter should come apart as shown below.
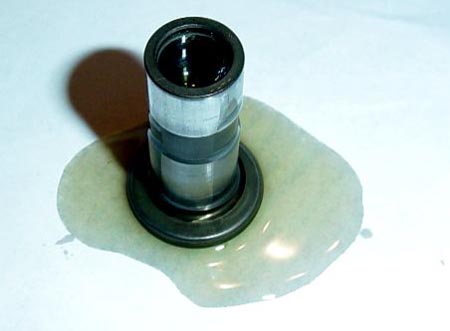
- Clean the lifter components thoroughly. I soak mine in Castrol's Super Degreaser (purple bottle, purple liquid), for ~30 minutes. Lacquer thinner may also work. When clean, your lifter should be a very nice shade of grey, not brown or red (if it's not grey, it's not clean, keep trying).
- Once clean, make sure the check valve is good. Holding the check valve assembly upright, pour a small amount of lacquer thinner into it. If the lacquer drains out, either the check valve is bad or still dirty. If it's thoroughly clean, replace the lifter.
- Once you've verified that the check valve assembly closes tightly, it's time to reassemble the lifter.
- Begin by filling the lifter body, about half full, with 30-wt engine oil (as stated above, I've recently begun using synthetic 50-wt engine oil with good results, though oil choice will be dependant on the temperatures the oil will see (cold)).
- Install the spring and then, the check valve assembly. Use a toothpick to press the ball bearing down, so the check valve assembly pushes all the way to the bottom of the lifter. Be careful to do this slowly as oil will squirt through the valve and hit you in the eye.
- Once the check valve assembly is in place, install the crown. Apply a light coat of oil to the top surface of the crown.
- Using the C-clamp again, compress the lifter. Insert the Allen wrench into the hole and then remove the clamp.
- Install the c-clip. I've found it best to lay one side into the channel and then press the other side in using a knife or small screwdriver.
That's it; you're done. Finish all other lifters in the vehicle and reassemble the engine. When you start the car, hold the idle at 1500 rpm for about 5 minutes, to bleed the lifters.
Note: Some initial tapping, after cleaning, may occur, but the noise should not return at subsequent startups.