
XenonZcar.com - Z31 Engine Component Reconditioning and Cleaning
The finish on many of the under hood components of my 300zx was faded and scratched. Besides being a bit unattractive, scratches and dents provide a point for rust. In this small section of the site, I will touch upon my experiences with engine component painting. I presently have refinished several under hood pieces; I will touch on the valve cover here, however, the process is the same regardless of what you are refinishing. If you have any questions, or find that some information is inadequate or lacking, please let me know.
- Coarse steel wool
- 220 grit sandpaper
- Aerosol paint stripper
- High-temperature engine enamel
- Solvent resistant rubber gloves
- Plastic trash bags
- Bottle of rubbing alcohol
Items needed
Procedure
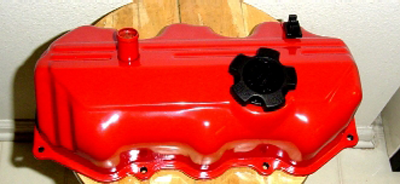
The valve covers on my 300zx were in fairly good condition; there were a few small scratches and the finish had faded a bit, though they were not an eye sore by any means. I removed the covers to replace the gaskets and decided to refinish them as well. The process I used to refinish the valve covers is laid out below.
- Remove the valve cover from your vehicle. If you try to refinish it installed in the vehicle, it will be almost impossible to achieve satisfactory results.
- Thoroughly clean the cover to remove all grease and grime. I let it soak in parts washer solvent overnight and then scrubbed both the inner and outer surfaces with #3 steel wool.
- Ball up a few pieces of notebook paper and stuff them into the holes in the cover (filler hole, crankcase port, etc) to protect them during stripping and painting. Also, remove any accessories such as spark plug wire mounts and covers.
- Cover your work area with a few trash bags and place the cover on top. Shake the can of paint stripper thoroughly and apply a liberal coat to the outer surface of the valve cover; be careful, the inner surface has a black finish on it that you don't want to remove.
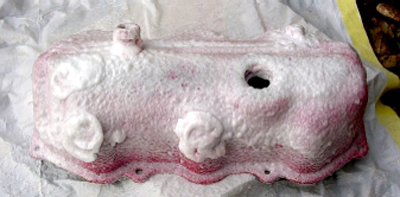
- Let the stripper work for about 10 minutes before removing it.
- Be sure to use rubber gloves while working with the stripper; this stuff is potent and will burn you good if you don't.
- Using a steel wool pad, lightly scrub the surface to remove the paint. When all of the loose paint is removed, rinse the cover with water and apply a second coat of stripper. Allow the stripper to work for about 10 minutes and repeat the steel wool scrub. Do this until all the paint is removed.
- When all of the paint is removed, the surface should be lightly sanded with the 220 grit wet-or-dry sandpaper. Dip the paper in a bucket filled with warm water and dishwashing detergent. Sand the surface to remove all surface rust and remaining paint. Be sure to sand every bit of the surface as this will allow the paint to better adhere to the surface.
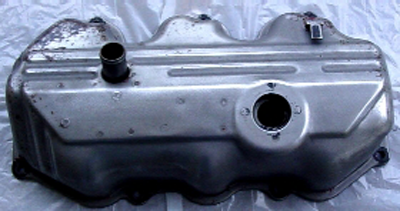
- When the surface is well sanded and free from rust, paint, etc, wipe it down with a rag saturated in rubbing alcohol and let it dry.
Prep the Cover for paint
- I used Duplicolor Engine Enamel; it contains ceramic pigment and can withstand temperatures to 500F. The color used here is Ford red.
- Shake the can of paint for about a minute and test it to make sure the nozzle is working properly (you don't want a bad nozzle messing things up now, right?)
- Apply a light coat to all surfaces of the cover. Pay special attention to the edges of the gasket mating surfaces and holes. You want to achieve a thick, protective layer of paint. It is better to do this via several thin coats, rather than one single thick coat.
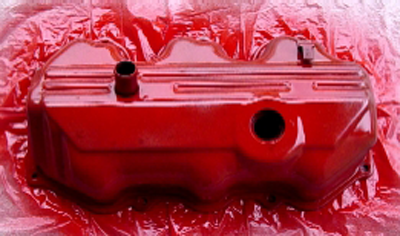
- Apply several successive coats of paint until you are happy with the finish. Allow the painted surface to dry at least 5 hours before trying to put it back on the car Allow more time if you are painting in an environment colder than 55 degrees.
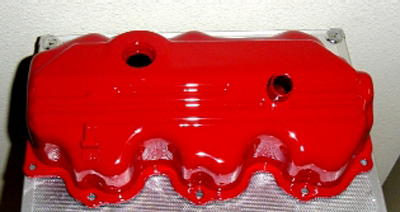
- When the surface has sufficiently cured, replace the spark-plug mount, filler cap, and adhere a new mounting gasket.
Painting the cover
Sources used on this page:
- Written and provided by: Redare